Granite Countertop Restoration: Step-by-Step Process & What to Expect
Granite countertops are known for their strength and long-lasting beauty, but even this durable stone can begin to show wear over time. Scratches, dull areas, surface residue, and uneven sheen are common signs that a granite surface needs professional attention. Homeowners often know something feels “off,” but aren’t sure what the restoration process actually involves or what results to expect.
This guide walks you through how worn granite surfaces are professionally refreshed, what each step accomplishes, and how to know when restoration is the right solution for your kitchen.
Why Granite Countertops Lose Their Finish
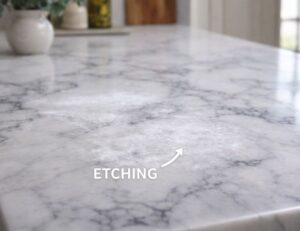
Although granite is denser than many natural stones, it is still porous. Daily use exposes kitchen counters to oils, food residue, abrasive contact, and cleaning products that slowly break down the surface finish. Over time, this can lead to a cloudy appearance, light scratching, or areas that no longer reflect light evenly.
In many cases, the stone itself remains structurally sound—the issue lies in surface wear rather than permanent damage. That’s why professional countertop restoration focuses on correcting the top layer instead of replacing the slab entirely.
The Professional Granite Restoration Process
Restoring granite is a controlled, step-by-step process designed to even out the surface, remove visible damage, and rebuild clarity. While the exact approach varies based on condition, most professional services follow a similar progression.
1. Surface Evaluation & Preparation
The process begins with a close inspection of the countertop. Technicians assess scratch depth, residue buildup, staining, and overall wear patterns. This evaluation determines how aggressive the resurfacing needs to be and helps avoid unnecessary material removal.
Before any work begins, surrounding areas are protected and the surface is thoroughly cleaned to remove oils and debris that could interfere with the restoration.
2. Scratch Reduction & Surface Refinement
Fine scratches and dull patches are addressed using professional-grade abrasives designed specifically for dense stone. This step gently levels the surface, reducing visible imperfections without altering the shape or edges of the countertop.
For homeowners dealing with noticeable wear from cutting boards, cookware, or daily use, this stage is where the most visible improvement begins to take place.
3. Honing or Polishing to Restore Clarity
Once the surface has been refined, technicians rebuild the finish. Depending on the desired look, the granite may be honed to a softer satin appearance or polished to restore its natural reflectivity. This step enhances color depth and brings back the crisp, clean look granite is known for.
4. Final Cleaning & Sealing
After the finish is restored, the surface is cleaned again to remove any remaining residue. A penetrating sealer is then applied to help reduce future absorption from oils and spills. Sealing doesn’t make granite indestructible, but it does make everyday maintenance easier and helps preserve the restored finish.
What Results Homeowners Can Expect
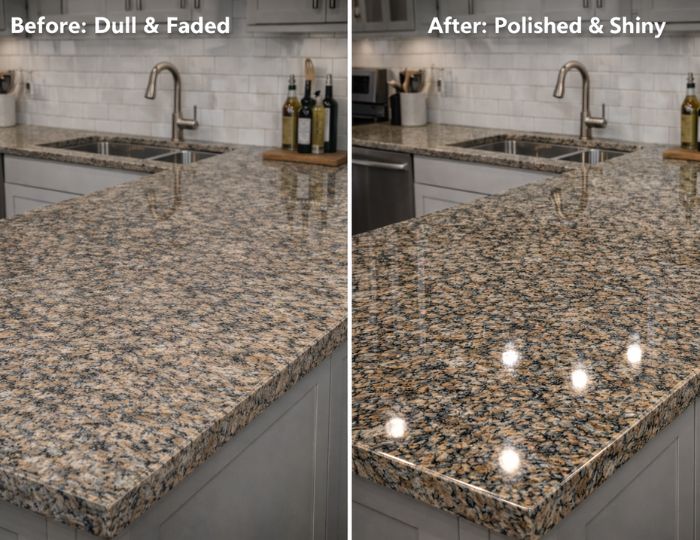
When professionally restored, granite countertops typically appear brighter, smoother, and more uniform. Cloudy areas are reduced, scratches are far less noticeable, and the surface feels clean and balanced again. In most cases, restoration delivers a dramatic visual improvement without the cost or disruption of replacement.
It’s important to note that natural stone will always retain some variation—restoration enhances the stone’s natural character rather than making it look artificial or overly glossy.
When Restoration Makes Sense vs. Replacement
Many homeowners assume worn counters must be replaced, but that’s rarely necessary. Professional granite countertop restoration is often the right solution when the stone shows surface wear but remains structurally intact.
Restoration is typically recommended when:
- The surface looks dull or uneven despite regular cleaning
- Light to moderate scratches are visible in certain areas
- Residue or haze won’t lift with standard cleaners
- You want to refresh the appearance without changing the kitchen layout
Replacement is usually reserved for situations involving deep cracks, structural damage, or major installation issues.
Frequently Asked Questions About Granite Countertop Restoration
Can scratches be removed from granite countertops?
Light surface scratches can often be reduced or removed through professional surface refinement. Deeper marks may not disappear completely, but they can usually be softened so they blend naturally with the surrounding stone.
How long does countertop restoration take?
Most kitchen projects are completed within a single day, depending on the size of the surface and the amount of wear present. Larger or heavily worn counters may take longer, but disruption is typically minimal.
Is countertop restoration cheaper than replacing countertops?
In most cases, resurfacing and restoring granite is significantly more affordable than full replacement. Restoration refreshes the existing stone without demolition, disposal, or new installation costs.
Does restoring granite change its color or pattern?
No. Restoration enhances clarity and smoothness but does not alter the stone’s natural color or veining. The goal is to revive the original appearance, not change it.
Can most countertops be restored without damage?
When performed by experienced professionals using proper equipment, restoration is safe for granite surfaces. The process is designed to correct surface wear without weakening the stone.
If your counters feel worn, cloudy, or uneven, understanding the restoration process can help you make confident decisions about next steps—and avoid unnecessary replacement. Be sure to also check out our complete guide to stone restoration.